Dress FormsShould I buy one or make one? It's so much easier to create amazing fashions when you use dress forms. Whether you're sewing for yourself or someone else, it cuts way down on the fittings, and gives you much more flexibility when sewing for yourself. You can imagine how hard it would be to make a fitted dress or even just to hem a dress while wearing it. On this page you will find what's available in commercial dress forms, and several options on how to make one. Here are the options as I see it: 1. Buy One 2. Make it out of duct tape 3. Make it out of brown shrink wrap 4. Sew one using the Vogue pattern #1004 "Shell"
This page will review each of these options, so read it over before deciding. After studying each of these options, I decided on the Vogue pattern, and will use the dress form I own now, as a stand. There will probably be some stuffing in a couple of places to get it right. See the whole project below, then read over the making of a dress form out of tape, but first more on the option of buying.
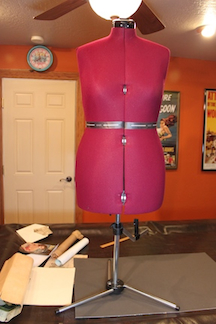 My Dress Form ExperienceI bought my dress form at Joann's Fabrics a few years ago, for appx $130. The positives are, it has a swivel ruler for hemming, it's adjustable, and the price was on the lower end. The negatives are the chest is flat and runs right into the waist with no definition at all, and my waist is about 2 inches longer than the dress forms waist, which is why I'm making one using the Vogue pattern (shell). I also have a dress form that was given to me by my nephew (What a guy). I use that one to try new ideas on for fun. It's most likely a size 4 so it wouldn't be something I could wear, but it's great for photos, and my daughter happens to be a size 4 with measurements very close, so I may make a shell of her measurements for this dress form as well.
What's on the Market?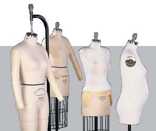 There are many choices, and the prices range from appx $100 to $2200. Some of the high quality dress forms (pictured here) include collapsible shoulders & hips, contoured pads, lockable wheels, adjustable height, legs, arms and much more, but you get the idea. Then there's a big used market as well, which is all the above, at a discount. Google "used dress forms for sale", or go to E-bay. The discounts I've seen were not huge, but I'm sure deals can be found on a good dress form if you put the time and effort in. Craigs list, or clearance & sales are a couple more options. If you decide to buy a dress form, I would suggest you take all your measurements and compare to the dress form your buying. If you find one that is close to your size (a little smaller is recommended), you can make a shell like the Vogue Pattern #1004, and place it on the form so you can fill in where necessary. Maybe you'll luck out and find a dress form that doubles your body. The bottom line is fit. Life will be so much easier and happier when working with a body that doubles yours. Otherwise ripping seams and messy work can result in trying to fit your own clothes, while wearing them. It can be done, and I have done it for years, but if you decide to do a lot of fitted fashions for yourself, then buy or make a dress form.
 Fabulous Fit $127 - Fitting System (contoured pads adhere to dress form under a tight stretch cover.
Pro Maxima $400 - Misses Sizes Pro Studio $475 - Misses Sizes Pro Series $727 - Woman Sizes Pro Matrix - $2200. Top of the line. Collapsible shoulders & hips, detachable legs, height adjustment, wheels & locks, and much more.
Making of Dress Form using Vogue Pattern #1004Cost Pattern $15 Fabric 0 (Owned for yrs) This is not a beginner project. If you've never done any sewing, this may not be the first thing you want to sew. Consider the other options, such as buying one or making one out of tape (details at bottom of page). Once you put a couple of small simple sewing projects together, revisit this page and if you are still in need of a dress form, and want to consider sewing one. Then you'll have some experience with the basics of sewing.
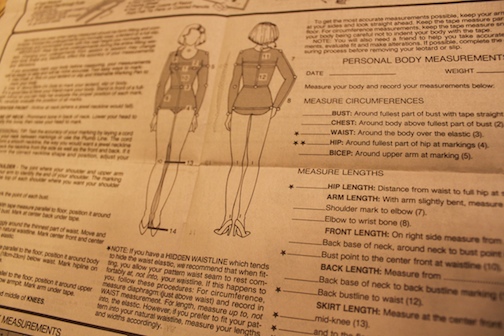
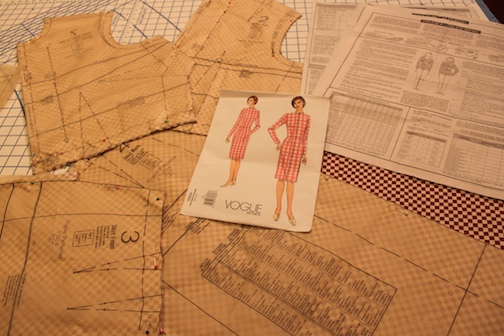 Decision? Although I have a couple of dress forms, I decided to make a dress form using Vogue pattern 1004. The photo below is one of the pages of the Vogue pattern. This is where you enter all your own measurements, then compare them to the chart, and make the adjustments accordingly. It's all organized in one place. I learned a lot about my body in this process alone. Something we don't always want to face until you're filling in the blanks. Every measurement imaginable is here.
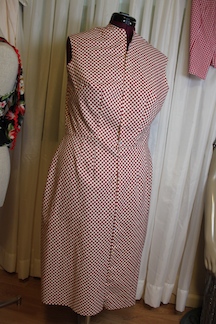
 Fabric Selection & Preparation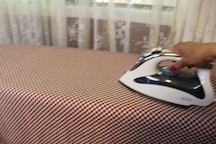 Fabric- Gingham, check and muslin, with 1/4 inch to 1 inch squares, are the recommended fabrics. The squares will be vital in the making and using of this shell. I had several in my fabric stash that would work, but needed almost 4 yards. I ended up using a cotton blend I've had for years, but it was just short of what I needed. I could do everything but the sleeves, so I decided to go ahead without sleeves for now. I may add them later. The color also went well with my dress form and the fabric is a good medium weight. First I washed and dried the fabric the same way I would wash it later, so I could be sure there would be no surprises after its finished. Always want to be sure it's not going to shrink after you've made your master piece. Then I pressed (not ironed). Keep the iron in one place and press, then lift and move to the next section and press. Do not move the iron around the fabric the way you would when your ironing a shirt. The hot iron could cause stretching of the fabric and distort your measurements. In the case of this shell, measurements are everything. All future garments will be based on this, so details matter here. Remember this is retrosewing, and recycling clothes and fabric already owned is part of the theme here. Spending little to no money is also a goal. This project will most likely live in your sewing room, so it's the perfect opportunity to use a fabric or sheets you already own. Just make sure it has the proper check or gingham. If all else fails, try the clearance bin at your nearest fabric store. There will be some unavoidable expenses on supplies occasionally, but utilizing what you have will cut down on expenses and free up space in your closets.
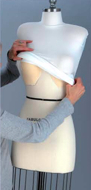
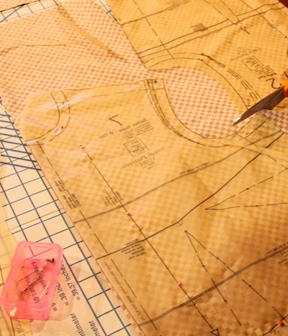
 After the fabric is prepared, lay it out according to one of the pattern diagrams. My fabric was 44 inches wide, so I folded it length wise as pictured here. Then made sure the fabric was square (details in the pattern). After everything was laid out, smoothed out, and square, I pinned it down.
 CuttingCarefully and patiently cut the fabric out. Make sure it doesn't move around. When laying it out, the squares in the fabric were also lined up. If you stretch or move the fabric when cutting, pinning, or anything else, you could cause all the measurements, and seams to be off. Sometimes a quarter of an inch doesn't matter so much, but in the case of this shell,or anything fitted, measurements are everything. I use medium scissors so I can get around corners easily. Of course sharp scissors, using long cuts. Open the scissors all the way each time, then closing carefully all the way. Try not to chop quickly, or unevenly. Patiently, slowly, carefully, and precisely.
 MarkingI've seen many options on marking the fabric. *Washable pen *Chalk *Carbon Paper *Colored Pencils I've tried them all, but my favorite is the one my sewing teacher Diana Stasko taught me. For this technique you need a washable pen ideally, and a pin (ideally with pearl head). First push the pin through the layers of fabric and pattern in the place you want to mark. The photo above shows the pin poked through the tip of the dart. Second, lift the pattern and mark the fabric, touching the pin on all sides of the fabric (4 marks). Just a dab right at the pin. Third, continue this at each dot of the dart, and any other dots or markings. 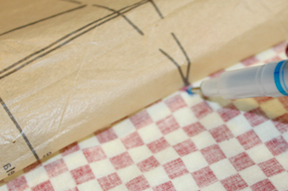 After marking all the dots, connect the dots for the darts with a ruler. Then continue to follow the pattern instructions. 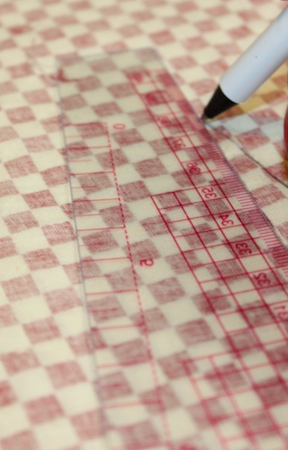 If your fabric is prepared, pinned, cut, and marked, then you may want to do one last review of the pattern to make sure you haven't missed anything, then continue on to sewing it up. I used a basting stitch for everything on this project, so that I could easily rip out if necessary. Especially when it comes to the final fitting. 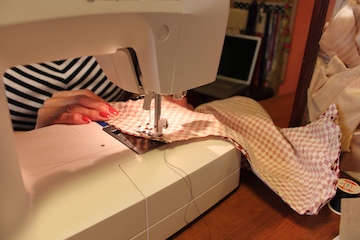 Pictured below is the top of the shell after sewing the darts, shoulders, and side seams. Next I'll press the darts flat, sew up the skirt and connect them at the waist. 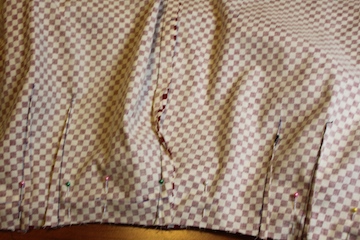 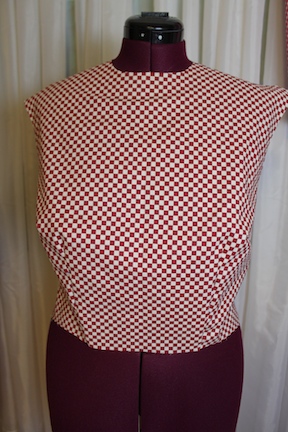 After reviewing the fit so far, I sew the darts and seams of the skirt. Then connect them at the waist. Below is a first try on of the full shell. 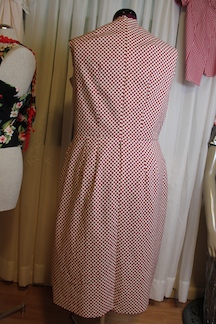 I check over the progress so far. The fit is so close already. Keep in mind the shell it is sitting on has a waist 2 inches shorter and smaller than mine. So in the final fitting, coming up soon, I'll need to do some serious thought to how I'll make it work. I'm also considering using the smaller dress form (size 4, instead of 12), then building up the padding. I've installed the 22 inch zipper that the pattern recommends, and that came out great.
 Make A Dress Form Out of TapeMake a dress form for $20. Two options. You'll need: * Friend * Appx 3 rolls of duct tape * Appx 3 bags of Polyfil or equivelent stuffing (old pillows) * appx 3x3 Cardboard (box). * Large sturdy clothes hanger * Scissors or * Friend * Appx 3 rolls water activated packing tape, sponge, water, scissors and a blow dryer This do it yourself version will be more exact to your body shape. Here's how: Put on an old t-shirt or garbage bag. It should cover your body from your neck to knees (fit snug like a tight t-shirt). Then get a friend to wrap your body (like a mummy) using either the duct tape or the shrink tape about 2 or 3 layers (make sure you can breathe and you are wearing the under ware that create the shape you want). Start with the smallest part of your waste. Wrap a 3 or 4 ft strip around the waste, like a belt, then a chris-cross through the middle of the bust area like a cris-cross bra. Continue carefully smoothing and shaping to the body. Use sponge to wet the water activated tape and blow dry to shrink (while on body) when done. Next your friend would carefully cut you out of it, by cutting straight up the center of the back. Close it back up using more of the same tape for the back seam. Stuff with Polyfil, expanding foam, or stuffing you already own (old pillows, fabric scraps, etc). Use the same tape to tape up the bottom to hold in filling. Stand Ideas: Get creative, look around to see what would work best for you. Here are some ideas: Umbrella stand Microphone & Hanger to make stand Christmas tree and Christmas tree stand Small heavy table with a small table top that would fit inside the bottom of the dress form. Legs could be cut to size. Coat Rack
Sew a Shell - Refer to the Vogue Pattern #1004 above for details. Back to Top- Dress Forms |
Sister Sites
