How to Make an ApronFrom the archives of www.retrosewing.net, now thediyeffect.com
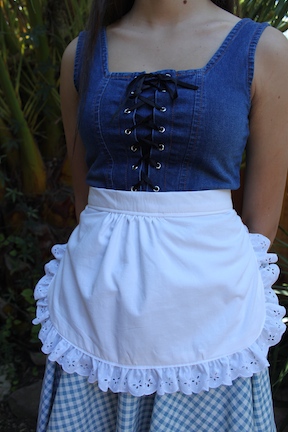
How to Make an Apron This cute little apron is a great addition to your costume chest. Great for a chef, Little Red Riding Hood, and French maid costume, to name a few "How to make an apron" is a popular request, so here is a simple apron using Simplicity pattern #0488. This is the perfect time to bring out any old white sheets and pillow cases. What better way to learn how to make an apron? The skirt Sierra is wearing (left) is a cute summer skirt, made using Simplicity' Poodle Skirt pattern. The actual Poodle Skirt (made out of pink felt) using Simplicity's Poodle pattern is in the photo at the top of this page. How to make this cute summer skirt  There are many styles of aprons. This one is made from Simplicity's sewing pattern #0488. There are only only 3 pattern pieces (pattern piece #13 used twice), so you could say 4 pieces. Pattern piece #13 is used for the front and the back, so pay attention on that step. This pattern has many pieces, for many costumes, so a pretty good value I'd say. Happy sewing! The photos on this page are large for your convenience. While making this apron, you can easily glance at the photos alongside the pattern instructions. You will need: appx 1 1/2 yards of fabric (sheets work great) appx 1 1/2 yards lightweight fusible (iron on) interfacing (to give waistband structure. Lay Out the PatternCut out a second pattern piece #13. One piece will be the back, and one piece will be the front, so don't forget to use pattern piece #13 to cut both.   MarkingMark the front and back pattern pieces by clipping the notches. Mark the waistband, and apron tie ends according to your size. Lots of length in these apron ties, so not to hard to get it right. Notice the marking on pattern piece #14. These notches (scissors pointing), will match up to the waistband later.   After cutting and marking the pattern pieces, lay out the front and back with right sides together. In the case of white sheets, as in this example, it doesn't matter. Be sure to turn your ruffle in, and not out. Remember after stitching this together, you will turn the right side out, and the ruffle will stick out, as you would expect. If you choose not to use a ruffle, then just stitch the front and back together (without ruffle), and turn right side out. Stitch it Together After stitching three sides (do not stitch waist), turn right side out, and it should look like photo below. Stitch between the two notches, using a basting stitch. Since this will be gathered a basting stitch (long stitches) is a must. Then take the thread from each notch, and gather as pictured below. The amount of gather will be determined by the waistband notches, which will be added next.  Prepare WaistbandThe waistband needs a little structure, which is why you apply the fusible (iron on) interfacing. In the photo below, you are looking at the waistband, along with a piece of interfacing cut to the size of the waistband (add notches where waistband notches are). On top of the interfacing is a damp cloth used to help the interfacing and waistband fuse. Just hold the iron on the damp cloth until nearly dry, and continue until the waistband and the fusible interfacing is fused.  Attach WaistbandWith right side of waistband, and right side of apron together, as pictured below, pin at notches, and adjust gathers as needed. Ease the gathers evenly between the notches. The notches on all layers should match up, then pin the rest of the waistband, and prepare to sew it together.   After sewing, it should look like this.  Last Step - Apron Ties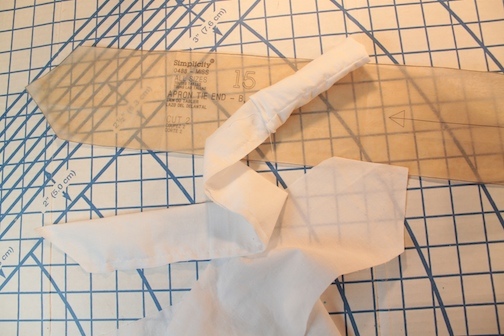 Press each of the apron tie ends lengthwise right side of fabric together (sheets won't matter). Leave the straight end open. After stitching, pull the tube right side out as pictured above. After pulling it through.Press, and it should like the photo below. Last step 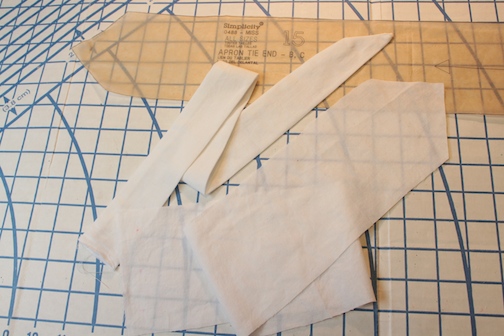 In the photo below, notice the upper edge of the waistband is pressed over 5/8" on all 3 sides. Ease the completed apron tie into the bottom half of the waistband, then fold the waistband over the apron tie. Then pin together and prepare to stitch. Notice my markings are not perfect here. Just adjust as needed. Photo below shows the full waistband and tie prepared for sewing, in this how to make an apron lesson.  Sew across the waistband and then along the joint where the waistband and tie meet, and your done with "How to Make an Apron"      Many OptionsThis adorable apron can be used for any occasion or just leave it as it is. Next time you want to know how to make an apron, just stop by this page and get a refresher.  Video Version of How to Make an Apron |

Subscribe with only your email
Costume Sewing
Back to Top - How to make an apron
Home Page
Sister Sites
