Doll MakeupPaints & Markers for Doll Makeup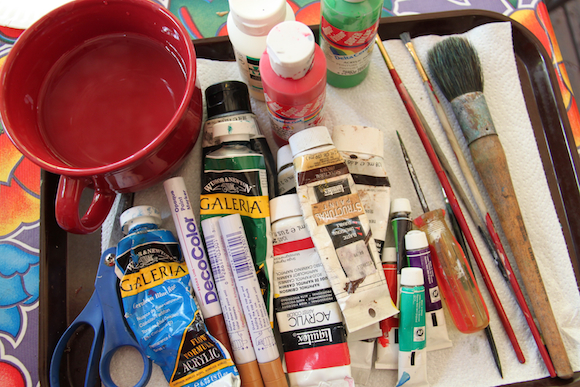 This doll makeup comes from many places. Since RetroSewing is partly about using and recycling found materials, I gathered all the paints and markers I already owned. Acrylic paint, permanant markers, and also model paint. This doll makeover project is not a restoration. Miss Dolly is being revived from the dump, and were having fun, not worried about what were using as much as just getting the job done and giving her back her adorable face and body. 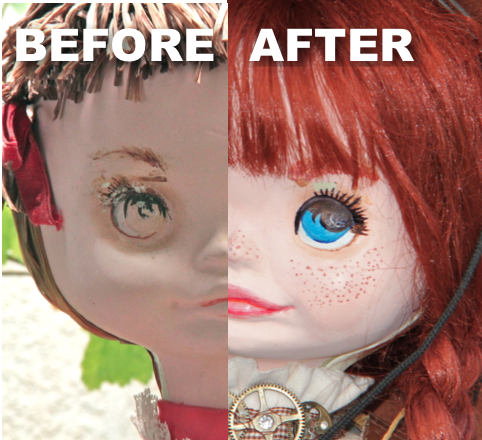 Doll Makeup Application in 6 Steps 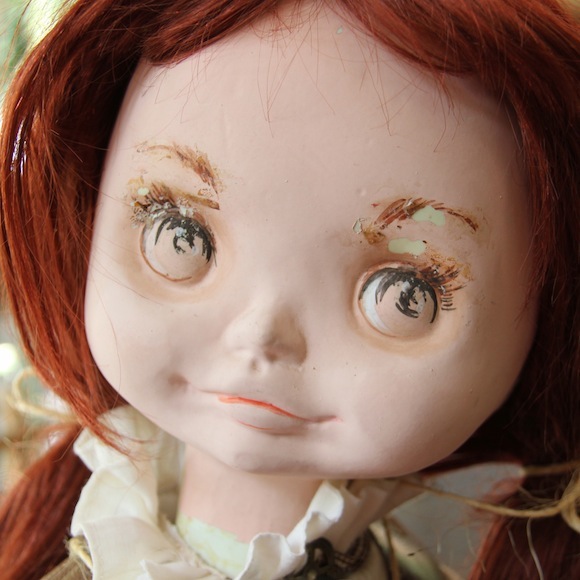 1. First a gentle cleaning with a damp cloth sprayed with a mild cleaner. 2. After completely dry, I lightly brushed her whole face with a clear low gloss paint for a little shine. 3. Added a few freckles by barely dabbing a tiny tipped brush onto her cheeks and nose. 4. For the eyes, I colored in the lines and did the best I could to find those old eye lids and lashes. Black permanant marker on the eye lashes and pupil, acrylic blue paint for the eye, and white for the eye ball. 5. The eyebrows are tricky, but I just took it slow and a stroke at a time. 6. Lips were done with a blend of pink and white acrylic paint. 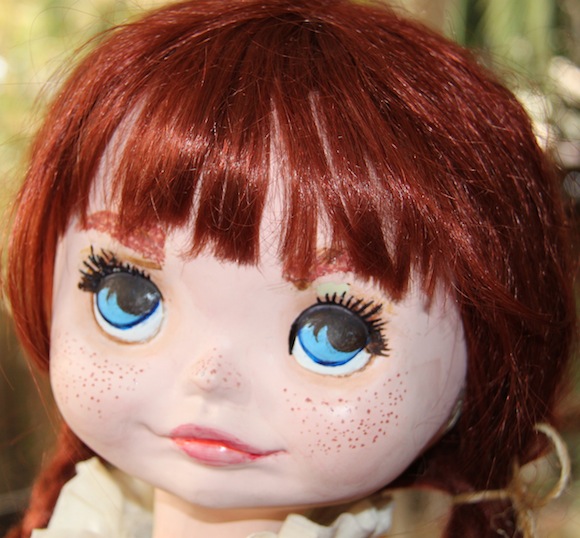 When she was all done, I used a little pearl white to highlight her lips, and a tiny bit of glow in the dark white on her pupil. She still shows some of her imperfections over the eyebrow, but some things best left alone. She's a little girl from the old west and she has a rough and tumble life, therefore a few scraps and bruises make perfect sense on her innocent little face. |
Subscribe with only your email
Sister Sites
